Ignition and Sparkplug B: A Practical Setup Guide
Ignition and Sparkplug B: A Practical Setup Guide

Key Highlights
- Start with Ignition quick start, then add the MQTT modules needed for an ignition sparkplug b deployment.
- Confirm your mqtt broker details, broker’s IP address, user credentials, and plant network access before testing.
- Use the mqtt engine and mqtt distributor with the transmission module to handle Sparkplug B data flow.
- Match Group ID, edge node ID, and host ID values on both sides to avoid connection issues.
- Set secure broker access and user permissions early, especially for plant-wide deployments.
- Tie HMIs and edge devices into a unified namespace for organized tags and meaningful data flow.
Introduction
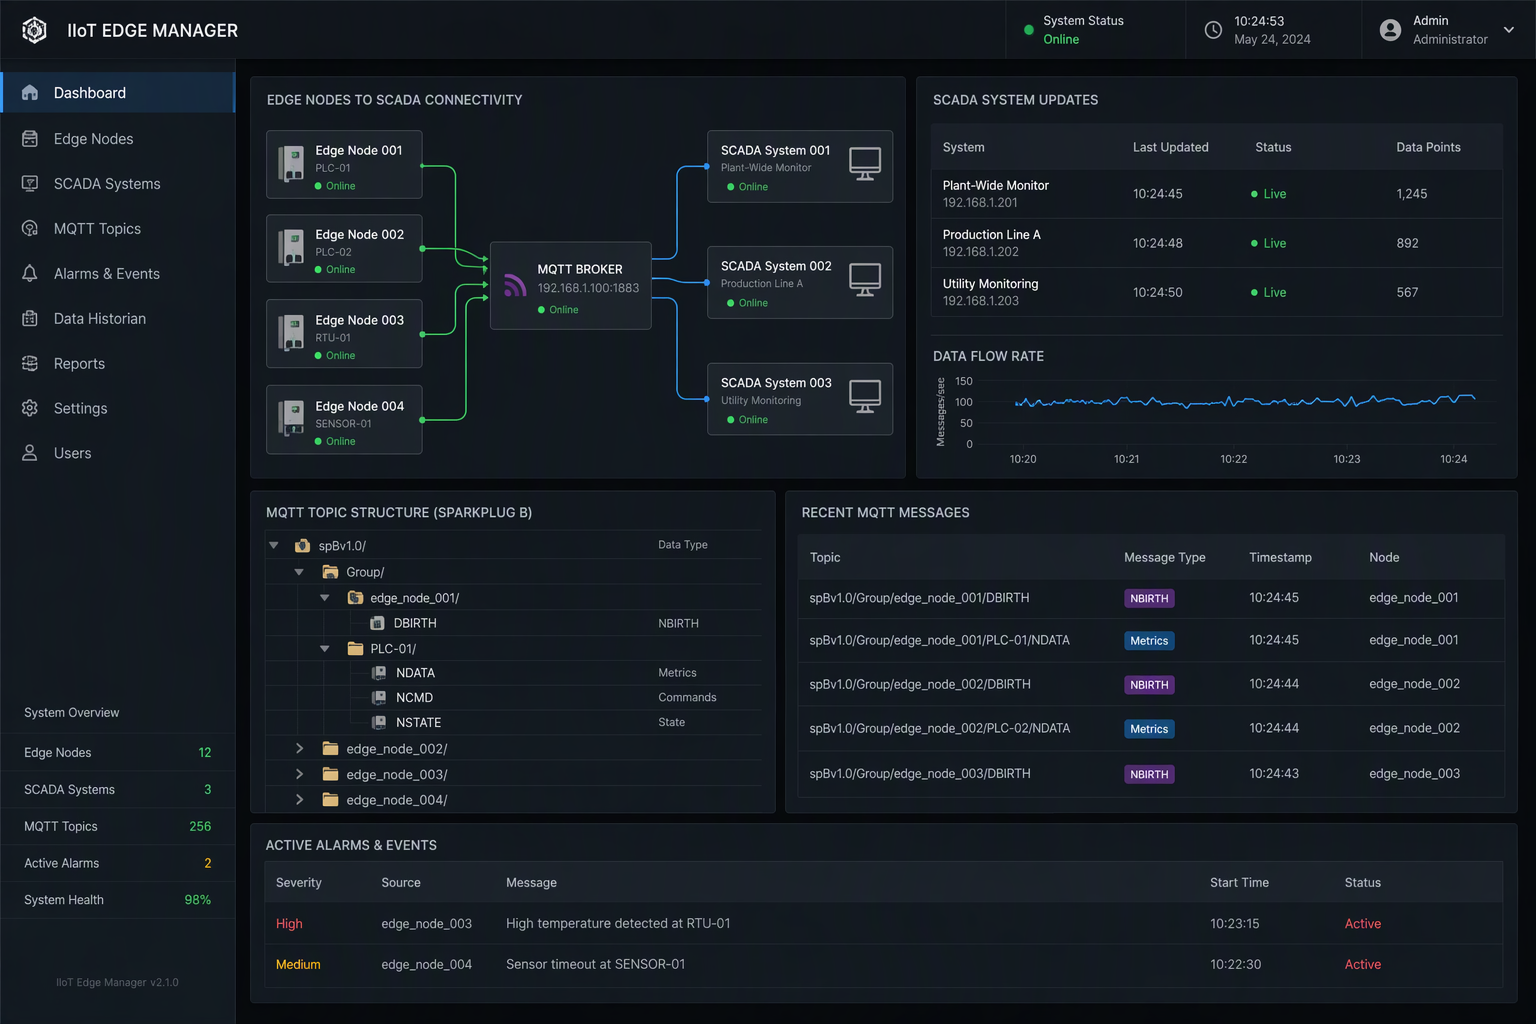
If you are planning an ignition sparkplug b rollout, you probably want fewer theory slides and more practical steps. That is the focus here. This guide walks controls engineers and plant managers through the initial setup of an Ignition Sparkplug B broker and the basic setup flow for Sparkplug B using Ignition, from install choices to mqtt transmission settings and HMI integration. The goal is simple: help you move device data in a structured way, reduce manual mapping, and get a working Sparkplug B connection without wasting a full weekend. Additionally, exploring example projects can enhance your understanding.
Understanding Ignition and Sparkplug B in Industrial Automation
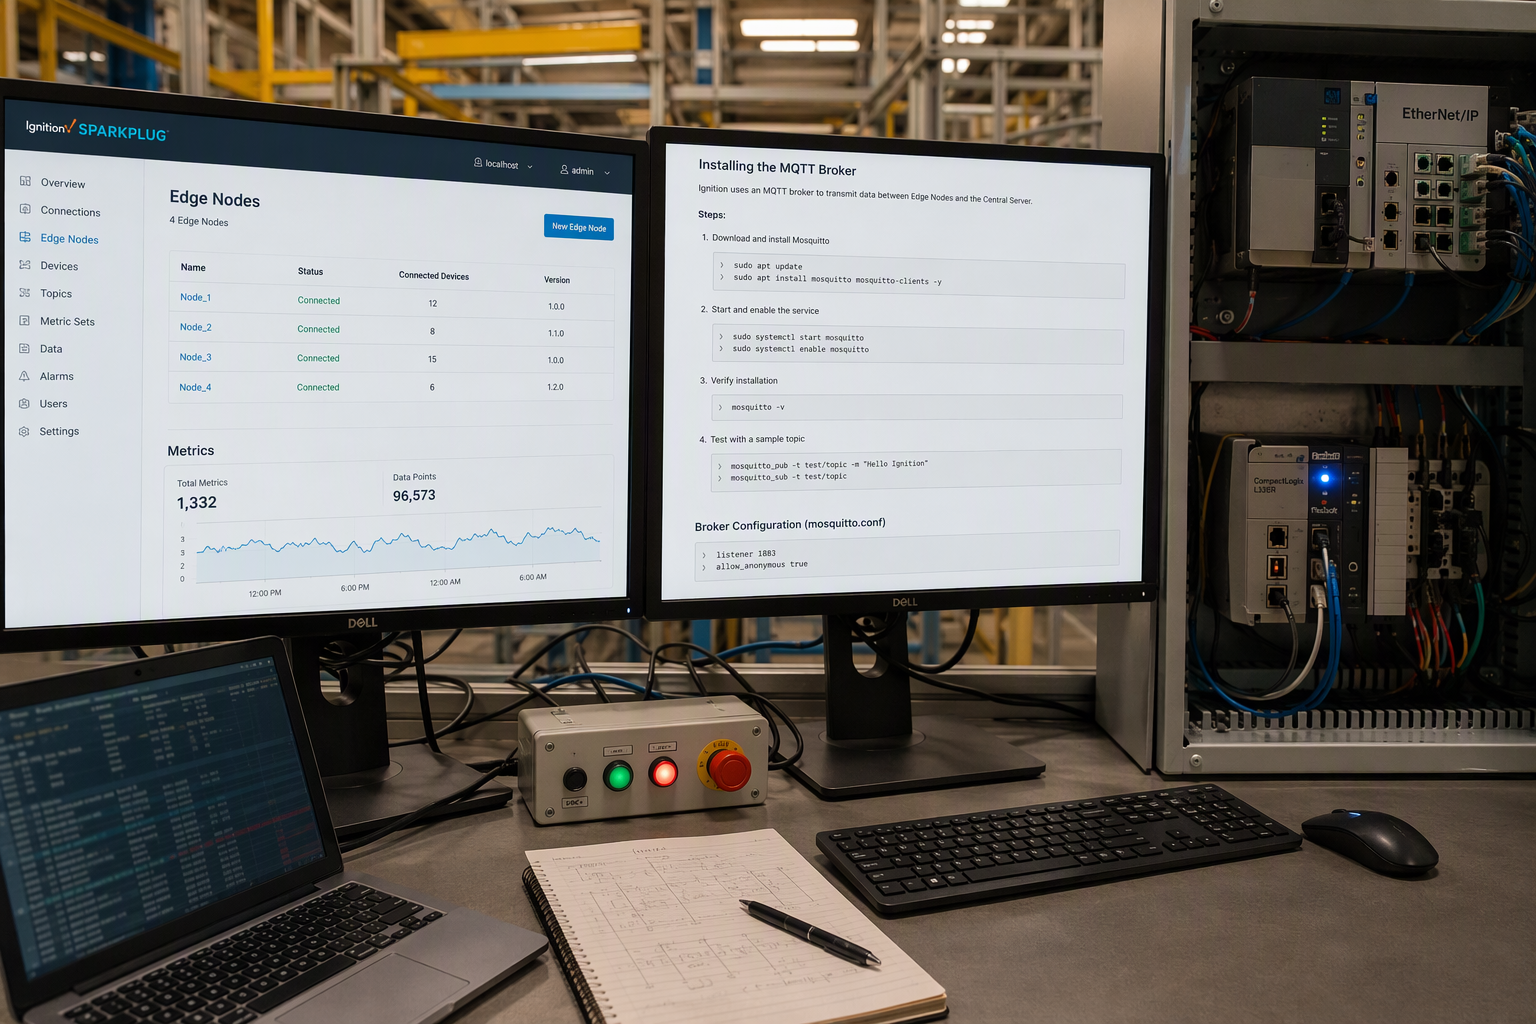
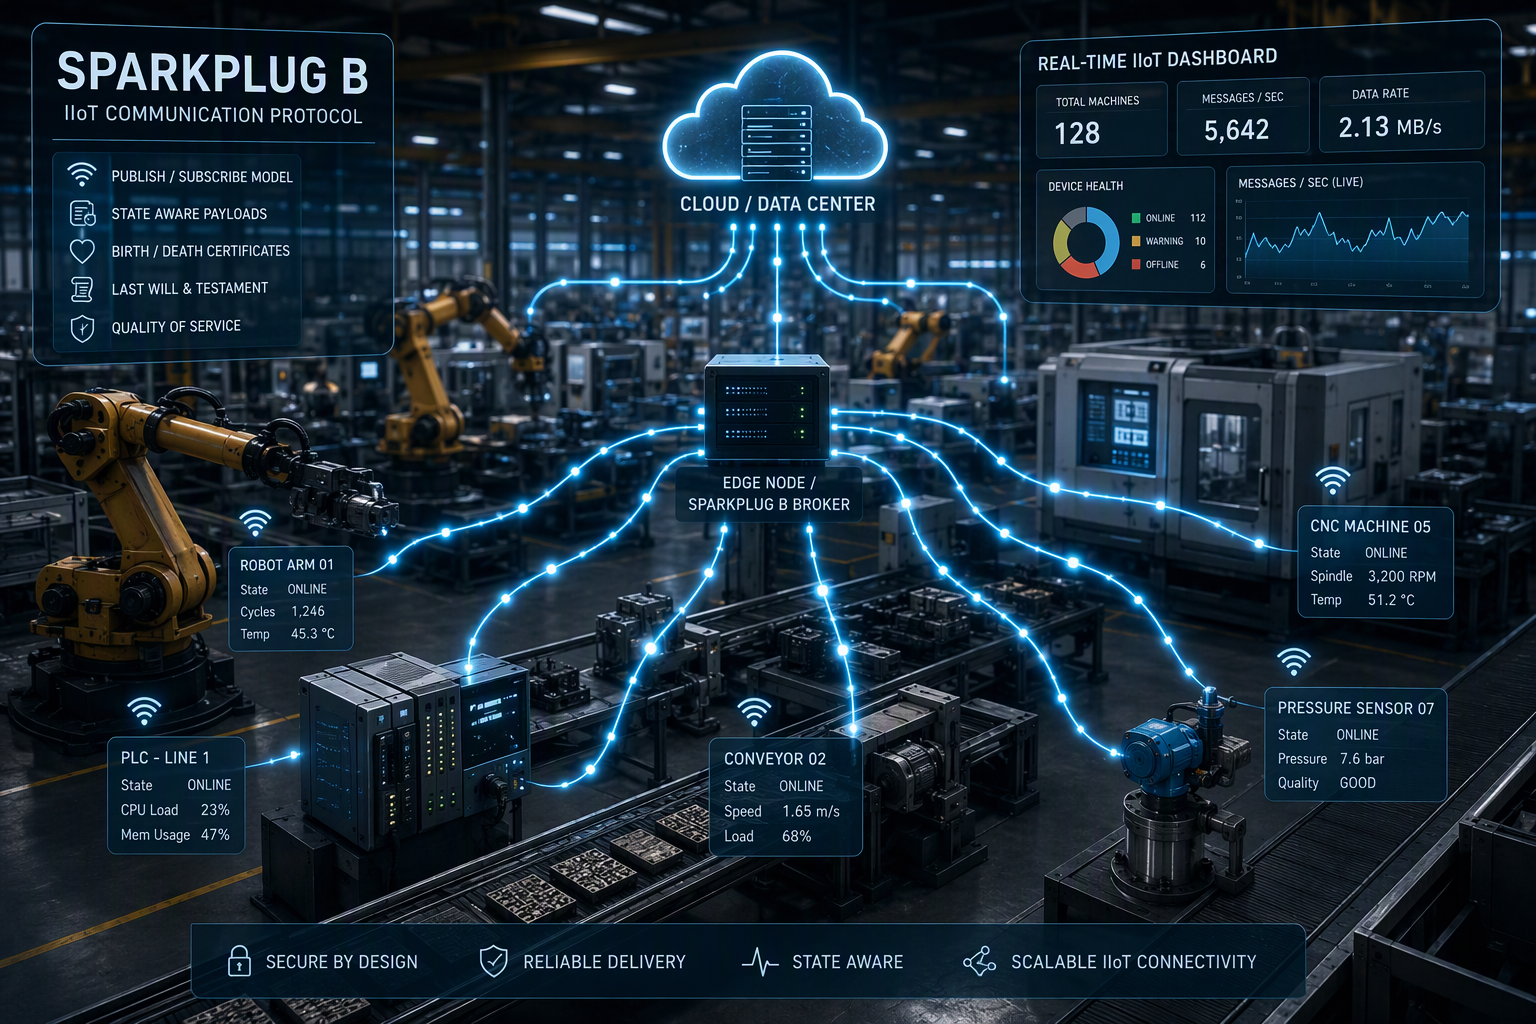
At a practical level, Sparkplug B gives MQTT a rulebook. Instead of loosely named topics and unclear payloads, you get structured data, organized topic paths, and built-in state awareness. That matters when your MQTT broker from Inductive Automation is feeding plant data to operators, engineers, and SCADA users.
Inside an ignition server, ignition sparkplug b works by pairing the broker connection with modules that understand the Sparkplug specification. The MQTT Engine reads Sparkplug B messages, recognizes edge nodes and tags, and turns them into usable mqtt data inside Ignition for clearer monitoring and control.
Key Concepts of Ignition for Controls Engineers and Plant Managers
Think of the ignition server as the hub where your plant data gets organized. You install Ignition, create an ignition user with full admin privileges, and use the web browser to open the ignition gateway. From there, you can enable quick start, install mqtt modules, and begin building the connection path for Sparkplug B messages.
To set up Ignition to receive Sparkplug B MQTT messages, start with the install wizard, choose the full edition, then load the third-party modules. After that, go into the ignition gateway and configure the MQTT Engine and related settings so incoming device data can be recognized and used.
- Ignition project: your SCADA application space, though quick start can speed initial setup.
- MQTT modules: the MQTT Engine, MQTT Distributor, and Transmission Module.
- Control address: the HMI-side address used for commands and status handling.
- Ignition server access: managed through the ignition gateway and admin login.
Why Sparkplug B Matters for Modern IIoT Applications
Regular MQTT is a fantastic transport protocol, but it does not tell you enough by itself. If a value stops changing, is the machine idle, is the sensor bad, or did the connection fail? Sparkplug B solves that by adding structure, clear topic rules, and state management that helps you separate a real zero from a dead connection.
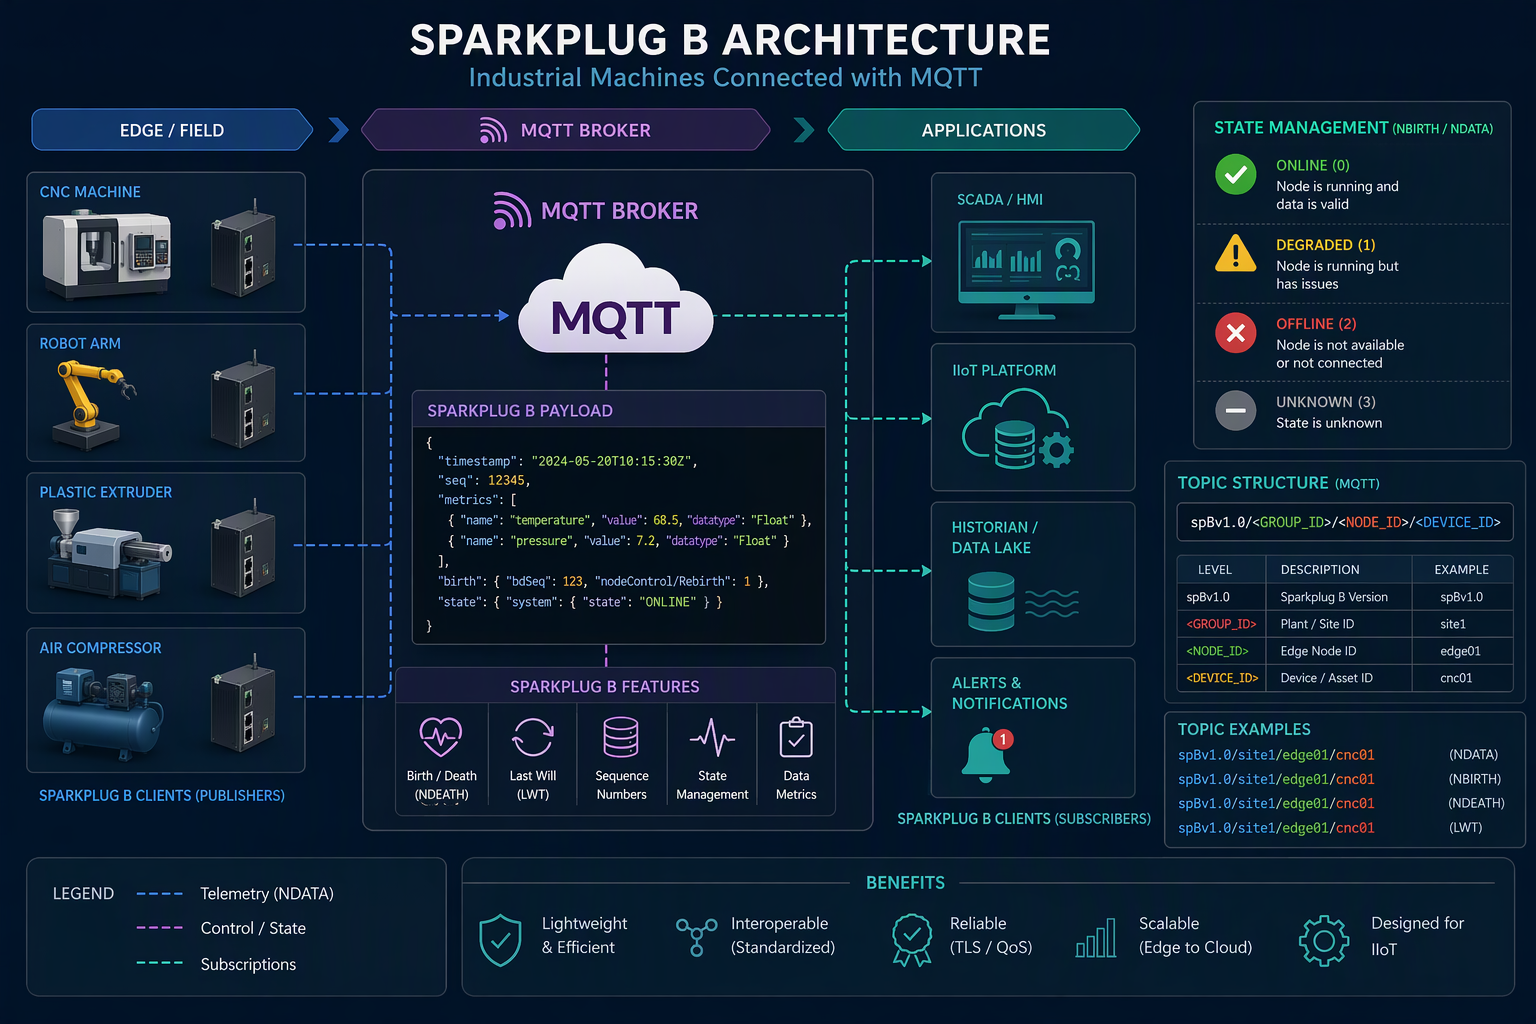
In an Ignition environment, that means less manual mapping and less guesswork. The sparkplug specification supports auto-discovery, so fresh edge devices can announce what they publish and subscribe to. That makes expansion easier when you bring on a completely different PLC or another line.
- Better state awareness through birth and death certificates.
- Cleaner mqtt transmission with organized topic structure.
- Easier onboarding of edge devices through auto-discovery.
Prerequisites and Initial Considerations for a Sparkplug B Setup
Before you touch settings, confirm the basics. You need Ignition installed, the required mqtt modules available, and a clear plan for user credentials, Group ID values, and edge node naming. If you are using an HMI, gather the same details there too.
Just as important, verify the broker’s IP address, port number, and plant network path. Your initial mqtt settings should be decided before commissioning starts. That includes who will connect on the broker side, what devices publish data, and how you want local tags exposed into the system.
Hardware and Networking Requirements for Deployment
You do not need an exotic stack to get started. Based on the setup flow here, you need a machine to run the ignition server, a device such as a Maple Systems HMI on the floor, and a reachable mqtt server path between them. Stable network access matters more than complexity.
Here is a simple text table showing typical deployment pieces:
| Use Case | Hardware or System | Key Setup Notes |
|---|---|---|
| Ignition broker host | PC running Ignition Gateway | Install full edition, enable quick start, add MQTT modules |
| Plant HMI node | Maple Systems HMI | Use EBPro, enable Sparkplug B EoN, enter broker details |
| Broker side access | MQTT Distributor user account | Match username and password with device login |
| Namespace identity | Server set and host ID | Use memorable names and keep them consistent |
Common challenges usually come from mismatched Group ID, edge node ID, host id, or login values. Another issue is basic internet connection or plant network reachability. If devices cannot see the broker side, check addressing, credentials, and whether the right server set is assigned.
Essential Software Components: Ignition, MQTT Modules, and More
For this setup, the software stack is straightforward. Install Ignition, choose the full edition, and log into the ignition gateway with an admin account. Then add the needed MQTT components so Ignition can act as a broker and also understand Sparkplug B traffic coming from devices.
The core software pieces are the mqtt engine module, mqtt distributor, and transmission module. In many Ignition environments these come from Cirrus Link, and they work together inside the platform. You will also want EBPro on the HMI side if you are connecting a Maple Systems HMI.
- Ignition full edition with admin access to the ignition gateway
- MQTT Distributor for broker functions
- MQTT Engine Module for Sparkplug B tag intake
- Transmission Module for outbound publishing and server set setup
- EBPro for initial HMI connection and tag mapping
Step-by-Step: Setting Up Ignition for Sparkplug B Communication
The hands-on path is simple: install Ignition, open the gateway, add MQTT modules, and configure the broker pieces in the right order. If you are setting up an ignition sparkplug b broker for the first time, sticking with defaults during the install wizard is a practical starting point.
From there, build the initial sparkplug b connection by configuring MQTT Engine, Transmission, and user access on the mqtt broker. Once that foundation is ready, you can bring in HMI devices and confirm that tags are moving both ways.
Installing and Configuring the MQTT Engine Module in Ignition
Begin by downloading Ignition for Windows, running the installer, and completing the setup with default options if you want the quickest path. Then open the ignition gateway, usually through the local browser address, choose the full edition, create your ignition user, and enable quick start.
Next, install the MQTT modules from Platform > Modules. Start with MQTT Distributor, then add the remaining modules and restart the gateway. After that, go to Connections > MQTT Engine > Settings. This is where the mqtt engine module is prepared to accept Sparkplug B traffic and expose it inside Ignition.
- In MQTT Engine settings, clear Block Node Commands.
- Clear Block Device Commands if you need device command flow.
- Save changes before testing any edge device connection.
- Review the dashboard and settings pages for active status and discovered nodes.
Setting Up Secure Broker Connections for Sparkplug B Devices
Security starts with basic discipline. On the device side, enter the correct broker’s ip address, port, and user credentials. On the mqtt broker side, create a dedicated user for the HMI or edge device instead of reusing the main admin login. That gives you cleaner control and fewer surprises later.
In Ignition, open MQTT Distributor settings and add the user that the device will use. Then align those credentials in EBPro or the edge device configuration. If you skip that step, the connection may fail even when the network path is good. Reliable state management also depends on a stable session between client and broker.
- Use a dedicated device login for each HMI or edge device.
- Keep usernames and passwords matched exactly on both ends.
- Use a secure broker approach with controlled access and planned failover behavior.
Sparkplug B helps here because its birth and death certificates show when a device is truly online or offline.
Integrating HMIs and Devices with Ignition Using Sparkplug B
Once the broker is ready, the next step is bringing plant-floor devices into the namespace in a clean way. A solid hmi connection depends on matching names, credentials, and tag structure between the HMI and Ignition.
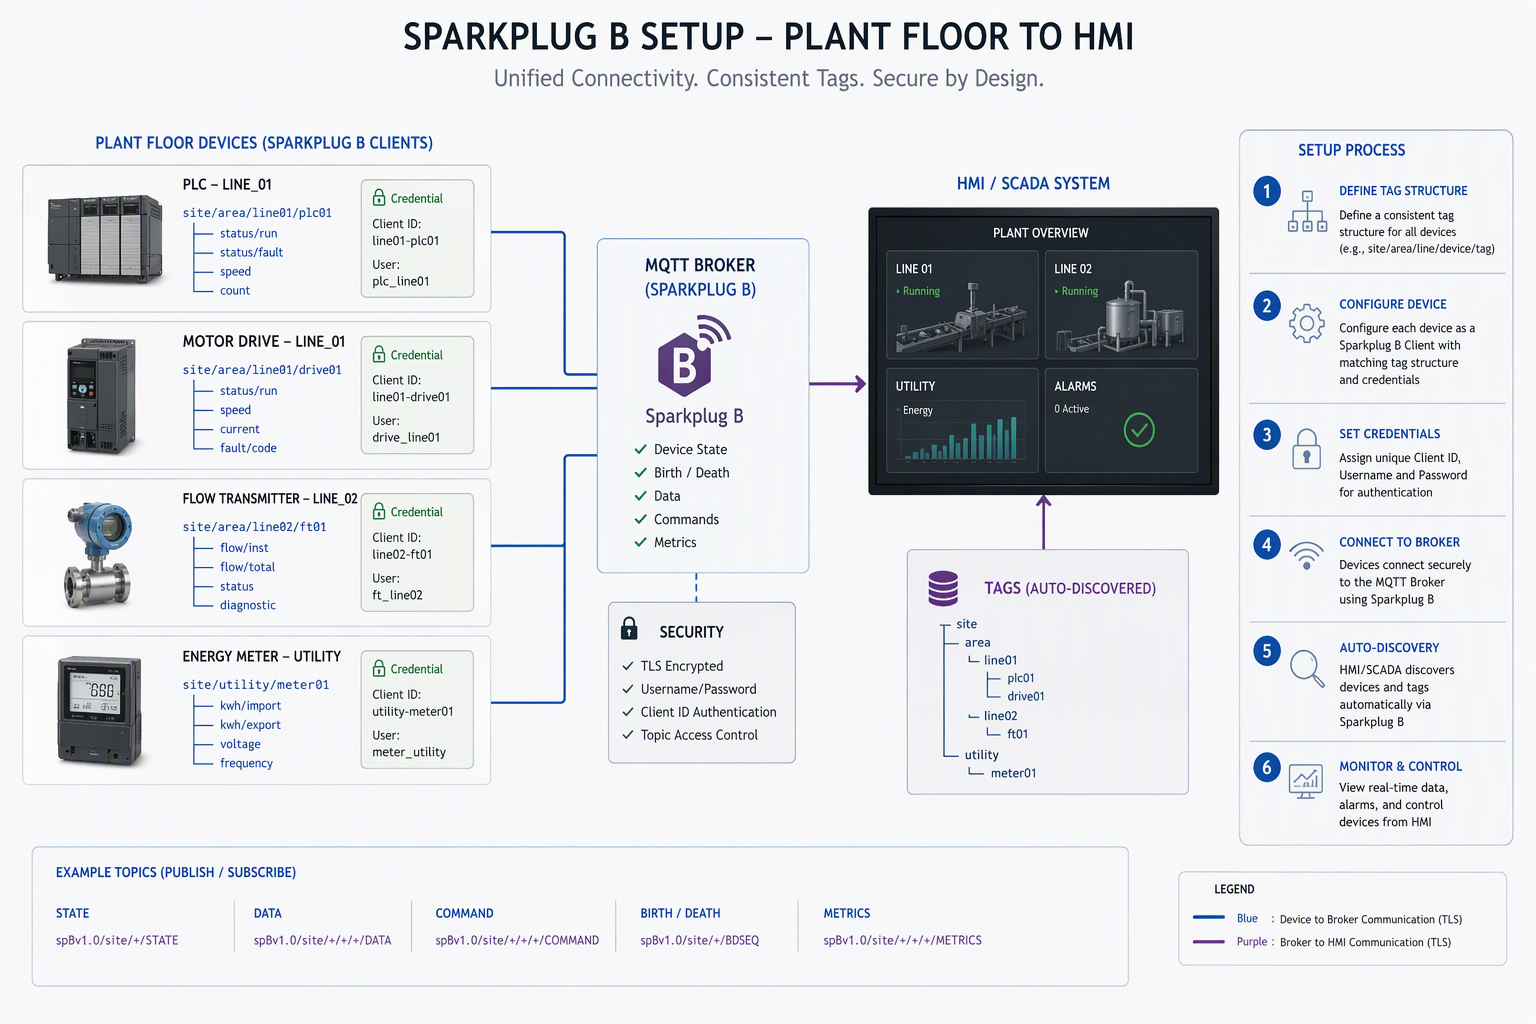
For a maple systems hmi, that means enabling Sparkplug B EoN in EBPro, entering broker details, and setting the same Group ID and edge node id used on the Ignition side. Done right, device data flows into Ignition with less manual cleanup and better visibility.
Connecting an HMI to Ignition via Sparkplug B
Start in your ebpro project. Go to IIoT/Energy > MQTT, enable MQTT, and set the cloud service to Sparkplug B EoN. Enter the broker IP address and port, then add the same user credentials created in Ignition. After that, open the Address tab and define a status address and a control address for the HMI.
Then return to the main MQTT window. Under the General tab, enter the Group ID and edge node ID values that match the Ignition side. This initial hmi connection is where many issues show up, so keep naming simple and consistent. In the Device tab, create a new group and attach meaningful tags to local HMI addresses.
- Use names in the Maple Systems HMI that operators and engineers will recognize.
- Match Group ID, edge node ID, username, and password exactly.
- If tags do not appear, review the broker connection and local address assignments.
Configuring Document and Data Tags for Seamless Data Flow
For Sparkplug B, the practical goal is simple: make device information easy to read, subscribe to, and act on. In this workflow, you build that structure by defining groups and tags on the device side, then exposing them into Ignition through the right tag provider. That supports meaningful data exchange instead of a pile of random topic strings.
In the HMI, create a new tag group under MQTT settings and add each tag you want to publish or subscribe. Give every item a useful name and map it to the right local tags or HMI register. In Ignition, use the default tag provider where the transmitter is configured so the data lands in a predictable location.
- Name tags by machine function, not by temporary test labels.
- Keep related tags grouped together for easier browsing.
- Match the source local tags to the intended published values carefully.
Conclusion
In conclusion, implementing Ignition and Sparkplug B can significantly enhance your industrial automation efforts. By understanding the core concepts and carefully setting up your systems, you not only streamline communication between devices but also improve data flow across your operations. This setup allows you to leverage real-time insights, leading to more informed decision-making and efficient processes. For more detailed insights on the Sparkplug B protocol, check out our comprehensive guide on What is Sparkplug B. As a Chicago-area systems integrator, Empowered Automation is here to support your journey towards modern IIoT applications.
Frequently Asked Questions
What is the unified namespace in Sparkplug B and how does it apply to Ignition?
In Sparkplug B, a unified namespace means devices publish data in a consistent structure so Ignition can organize it predictably. In the ignition gateway, that depends on matching the server set, group id, and edge naming. The result is cleaner tag discovery, clearer status, and easier expansion across connected assets.
You might also like